

Tips for a live online consultation
A large proportion of GPs feel they lack digital skills and most want to develop their digital skills further. This is evident from recent research From the GP Social Fund Foundation. Picture calling is one of the worst scoring skills and an activity that GPs prefer to avoid. A shame, because image calling with patients brings many benefits. Sophie tells you in this blog what the advantages are and gives you some tips to make your live online consultations a success.
Live online consultations are time- and cost-saving because there is no travel time and the conversations are often shorter and more substantive (less chitchat). This allows you to have more conversations in a day. Because a conversation takes less time, you can use image calling to schedule more conversations with the same patient so that they receive regular medical advice and you promote the doctor-patient relationship. Furthermore, the live online consultations are more accessible for patients who are less mobile, because they can get in touch with a doctor more easily. But also for patients who live on the other side of the country, it is now easier to get specialist help. Finally, some patients can express themselves better and more easily because they are in their own familiar surroundings.
Sounds good right? But how do you conduct such a live online consultation? Because once you know where all the buttons of your video call app are, you're not there yet. A live online consultation requires a different approach than a consultation in the physical consultation room. In this blog, following Silverman's (2014) consultation model, Sophie gives you some practical tips to get you started. For each step of this model, she has some tips on how to apply this consultation task live online.
Consultation task 1: Starting the online consultation
The consultation starts even before the patient arrives, namely with the preparation! A consultation via image calling involves a few new steps. First, you have to check whether you are ready for the online consultation. Having the right equipment is essential. Do you have a webcam, a stable internet connection and a headset or earphones? After all, you don't want a faltering image when you are video conferencing. If you don't have the right equipment, be sure to mention this to your employer.
In an on-site consultation, you probably make sure that you and your consulting room look professional. The same goes for a live online consultation. For example, what do patients see in the background? How do you make sure you are clearly visible? And how do you create a professional image? Check to see if you present yourself well on the basis of these tips for digital presentation skills.
Finally, you don't want a patient to enter the session when you're not ready - or even worse - when you're still talking to another patient. So always use the digital waiting room / lobby so you can decide who you allow into your online sessions and when.
Are you ready for the live online session? Great! Don't forget to check if the patient is ready too. You don't want the patient to fail to get into your session and you have to spend a lot of time on this causing all your subsequent calls to be delayed.
To avoid technical problems, it is helpful to send an invitation email to the patient with participation instructions before the live online consultation begins. Does the patient need to install an app? Is there a direct link to the session? What technical requirements must the patient's device meet? And what are common questions and technical problems?
Consultation task 2: Gathering information
In the second consultation task you inform the patient about the nature, the origin and the course of the complaints, and you discuss the mutual expectations. In an on-site consultation, you already observe the patient when they walk into the room and then start the conversation. Online, it is more difficult to observe the patient or get the symptoms clear. But don't worry, the great advantage of a live online consultation is the ability to make the complaints or information visual by sharing content and letting the patient annotate on it. In this way, you engage the patient more in the conversation.
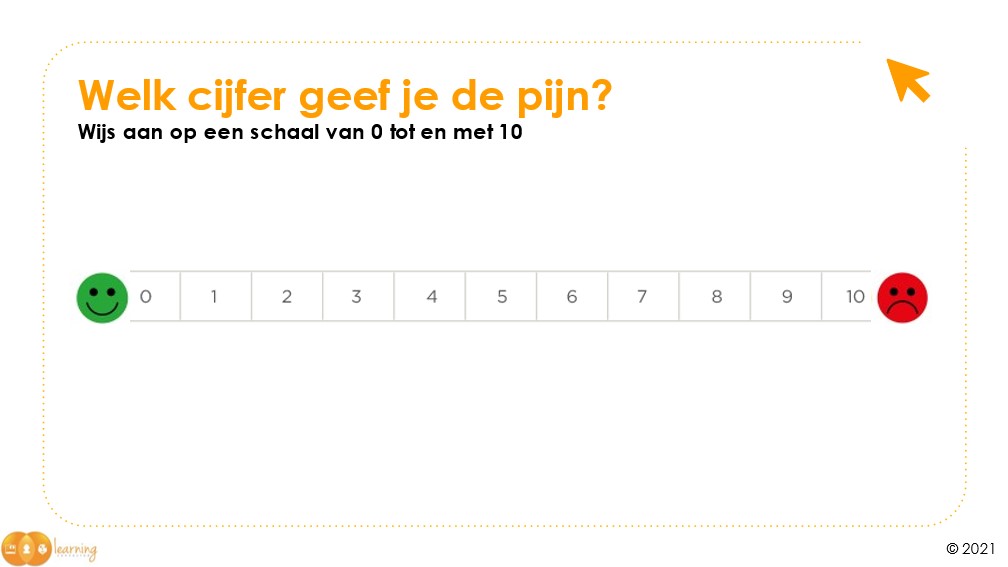
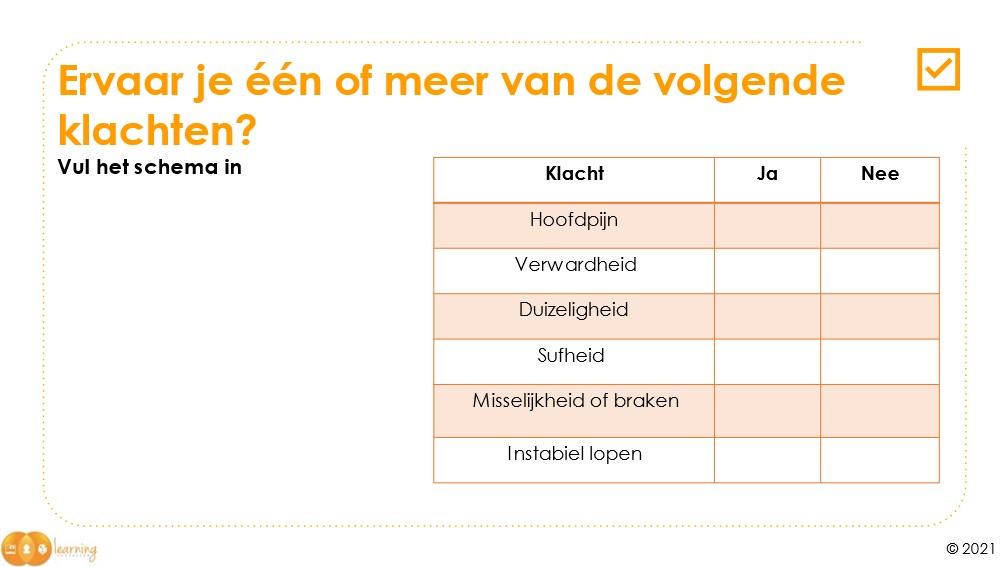
For example, if you want to know what the patient's symptoms are, you can have the patient fill out a chart, type something on the whiteboard or point to it on the screen. Does this all sound a bit abstract? Then check out some examples of PowerPoint slides below. You see, visual material clarifies a lot 😉 .
Consultation Task 3: Physical Examination
Not all complaints can be examined equally well online, and not all patients like an online consultation. Therefore, when making an appointment by phone, the physician assistant can best determine whether the appointment should take place online or on-site. It can also be useful to schedule an online consultation hour in which patients can have a low-threshold conversation with you, the physician. If necessary, you can schedule a follow-up consultation on location.
Is an online consultation scheduled that requires physical examination? Then don't just start. First reassure the patient and clearly explain what you want to examine and why. There are a number of tips to make the online physical examination easier:
- Give the patient clear instructions to perform physical examinations on themselves. What should the patient pay attention to? What actions should the patient perform? And what should the patient show for the camera?
- Ask for help! Is there a confidential person around the patient? If so, ask if this person would like to look with you in places that the patient cannot reach easily by themselves (e.g., the back).
- Use available resources that the patient has on hand. Does someone have their own blood pressure monitor? Or perhaps a smartwatch that can be used to measure a heart rate?
- Do you have patients with chronic symptoms? Especially for them, a live online consultation is of great value. Schedule follow-up appointments online and let patients track certain results or measurements online.
Consultation task 4: Explanation, planning and advice
In the fourth step, you establish the diagnosis and share your findings with the patient. As also mentioned above, a great advantage of a live online consultation is that you can make your findings and diagnosis visual. You can of course explain verbally what is going on, but it is much easier and clearer if you share a video or image.
For example, show a short video explaining a particular condition. Or share an image where you can explain exactly what is going on with the patient. Are you going to fill out a treatment plan? Then share your screen with the patient so they can look at it with you. This also makes it easier for the patient to indicate if something is unclear.
Consultation task 5: Ending the online consultation
The final phase is the completion of the consultation. When imaging patients, it is especially important to check that he/she has understood everything correctly. Summarize the conversation, name the next steps, evaluate and plan space for questions. Here, too, it is good to visualize all the steps. So write down what you and the patient have discussed together and show it to the patient. Then you immediately have an overview that you can take with you to any follow-up appointments.
Consultation Task 6 and 7: Providing structure and building a relationship
During the consultation, it is important to provide structure and build a relationship with the patient. If you apply the tips to the other consultation tasks, you will automatically ensure a structured session and a pleasant environment for the patient as well.
Want to learn more about live online conversation and image calling with patients? Then sign up for our workshop and practice with a training actor.